How to use silhouette dies in a bench vise
 Joanne Tinley
Love the look of hollow beads but don't have a hydraulic press? Learn how to use your bench vise instead!
I love making hollow forms so much that I've written a book all about the different ways of making them, and have designed my own range of silhouette dies too!
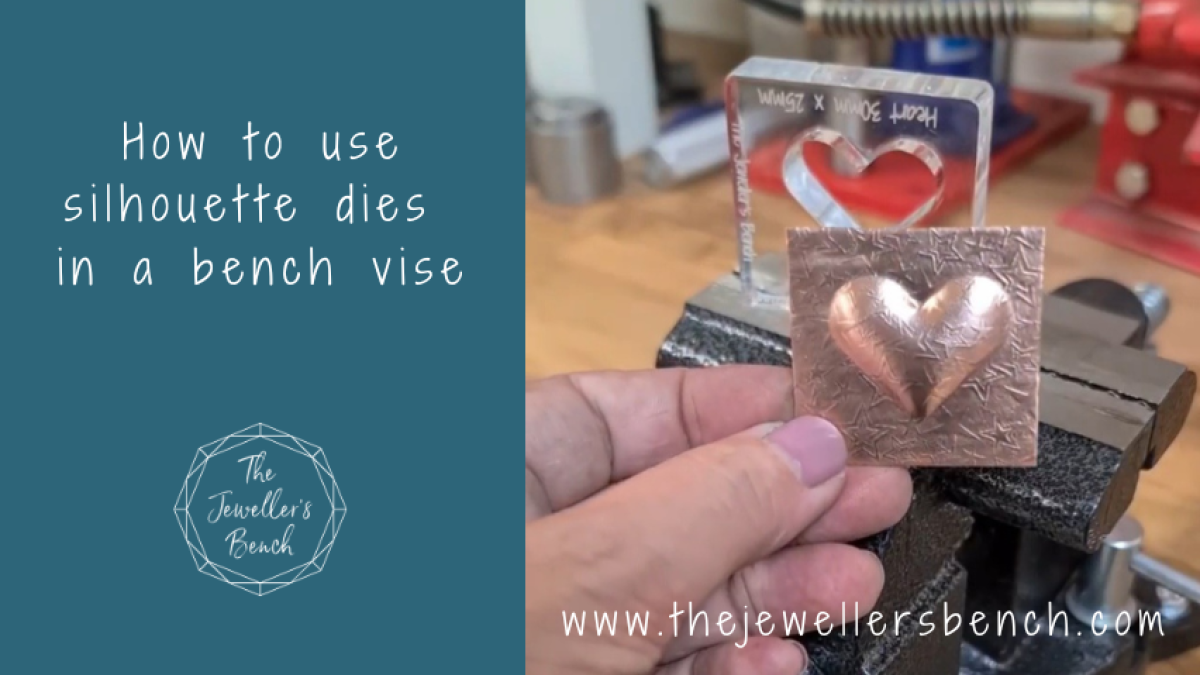
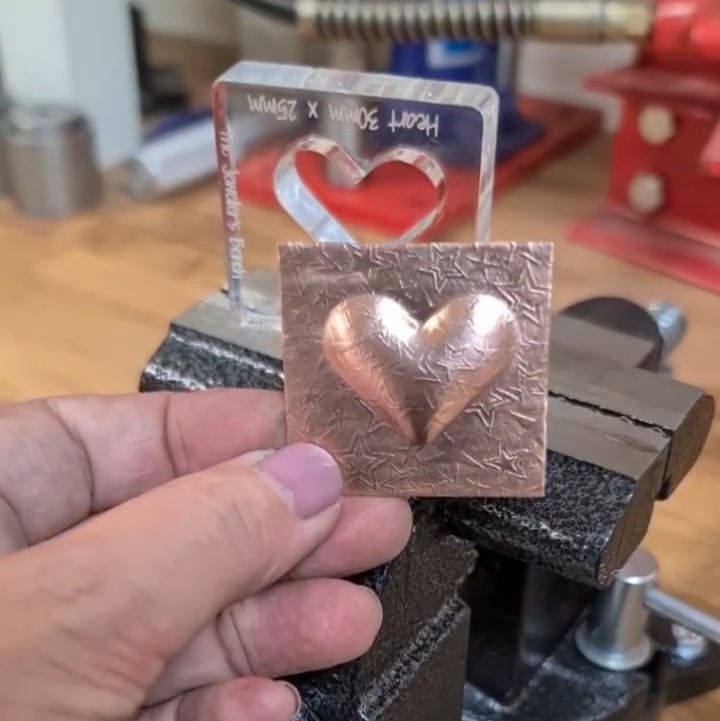
If you haven't come across a silhouette die before, it is a thick piece of hard material with a hole in the middle. That hole can be almost any shape you like, but it's important that it is cut accurately and smoothly - which is why my laser cut silhouette dies are so good!
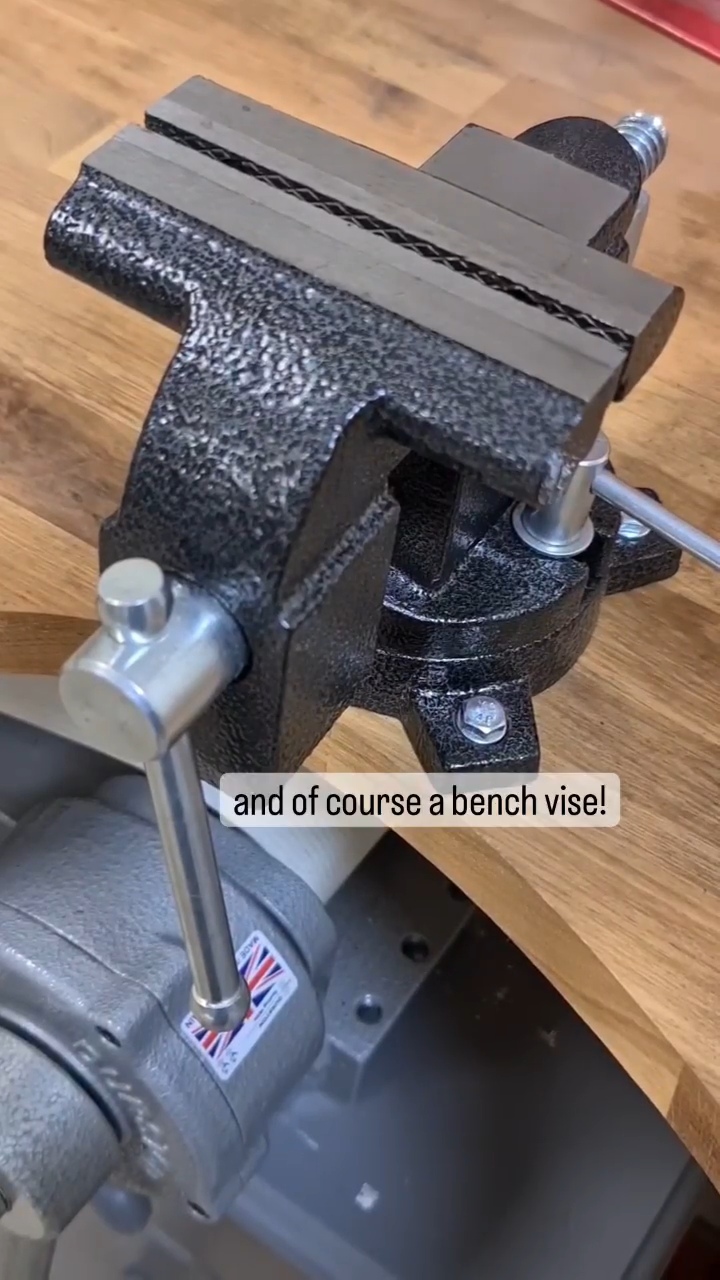
To use the dies, place a piece of metal sheet (0.5mm is ideal) on top of the die and add rubber sheets on top. The rubber will be pushed into the hole in the die, taking the metal with it and creating a beautiful shape. The easiest way of doing this is with a hydraulic press, but an ordinary bench vise will work beautifully too! Read on to find out how this works...
You will need:
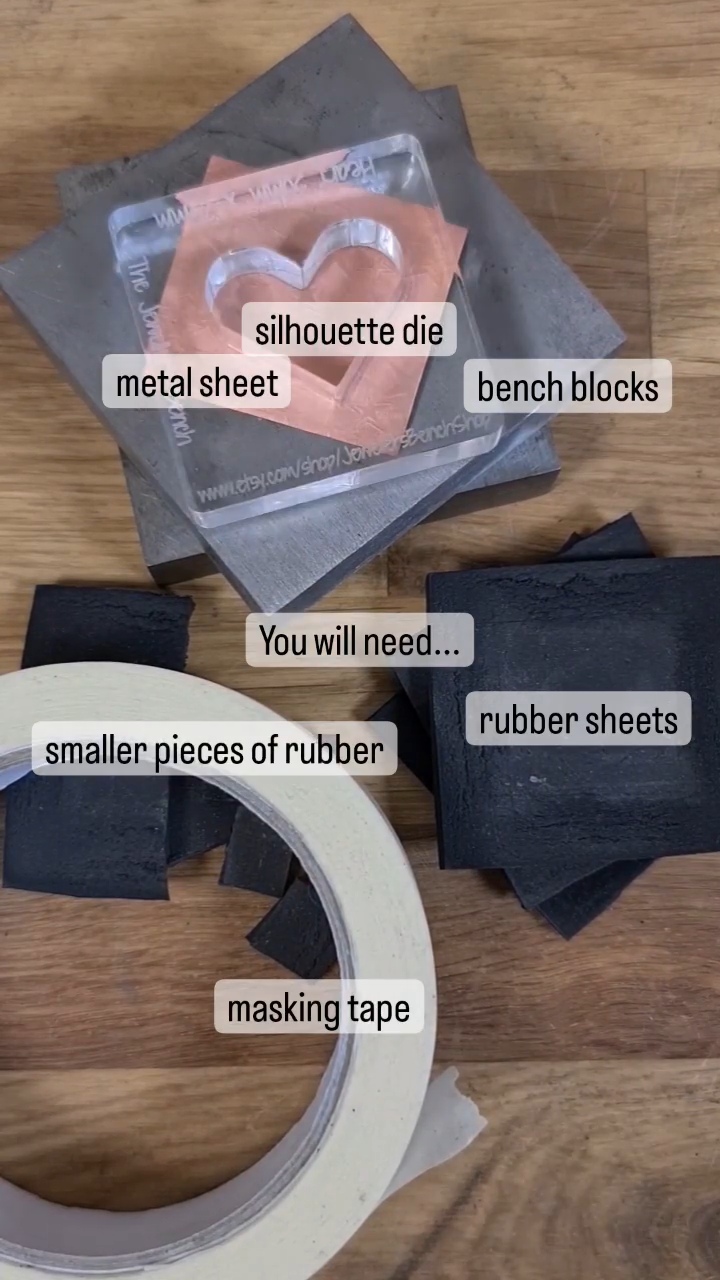 |  |
And here's how to do it!
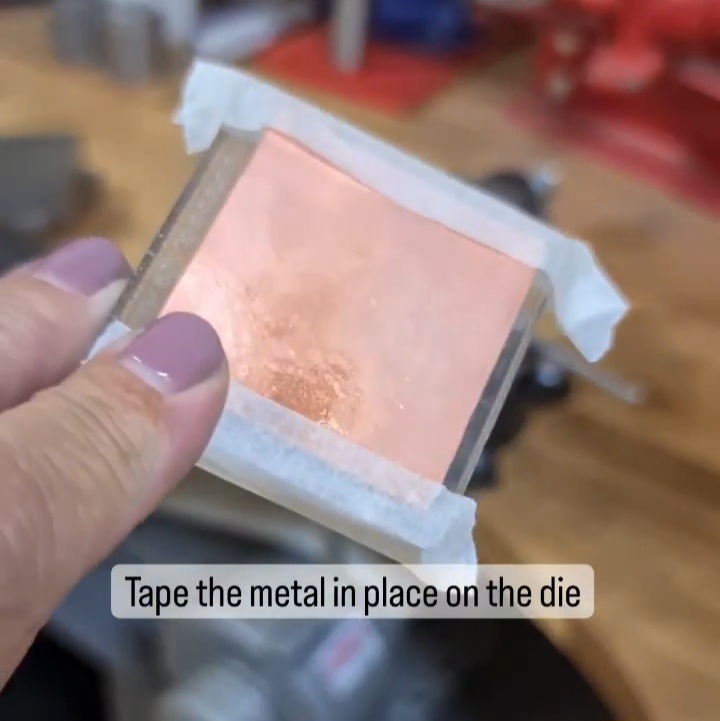 |  |  |
1. If you'd like your shape to have a texture, do that job first
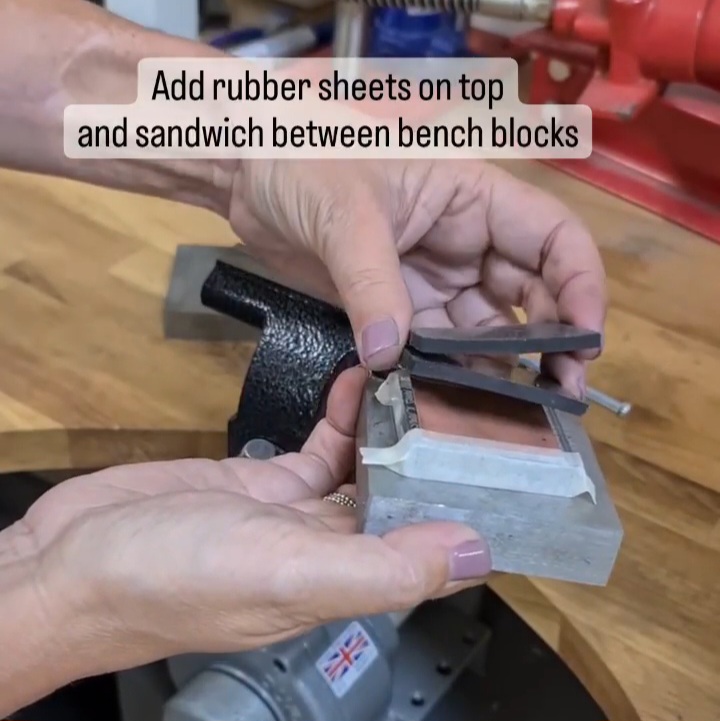
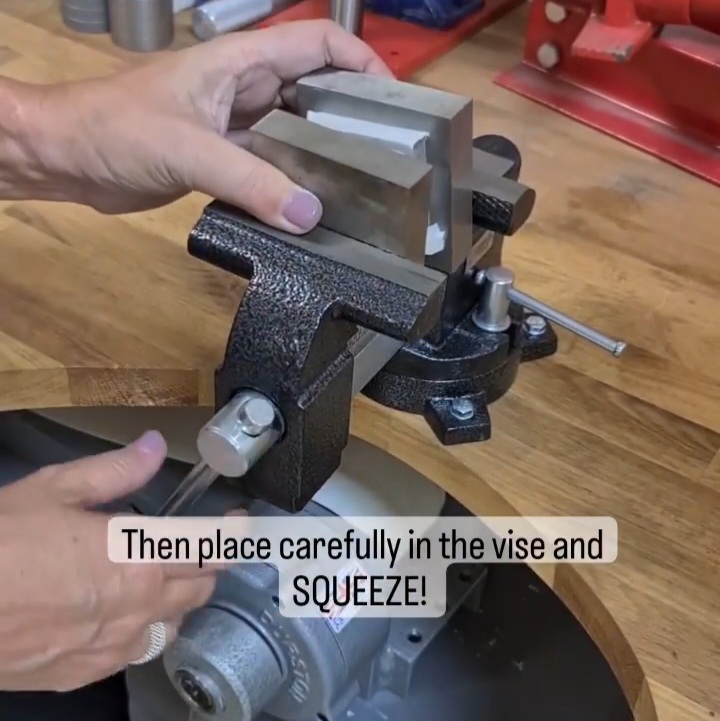
and then anneal the metal. Tape the metal, texture side down, on the die. As the die is clear perspex you will be ableto look through it to choose the best part of your texture. | 2. Add one or two rubber sheets on top of the metal, and sandwich all this between two metal bench blocks. | 3. Place all this in your bench block - carefully as it's heavy and you don't want to drop it! Close the vise jaws as tightly as you can. This will squeeze the rubber and force it to push the metal sheet into the hole in the perspex, pushing the metal in with it.
|
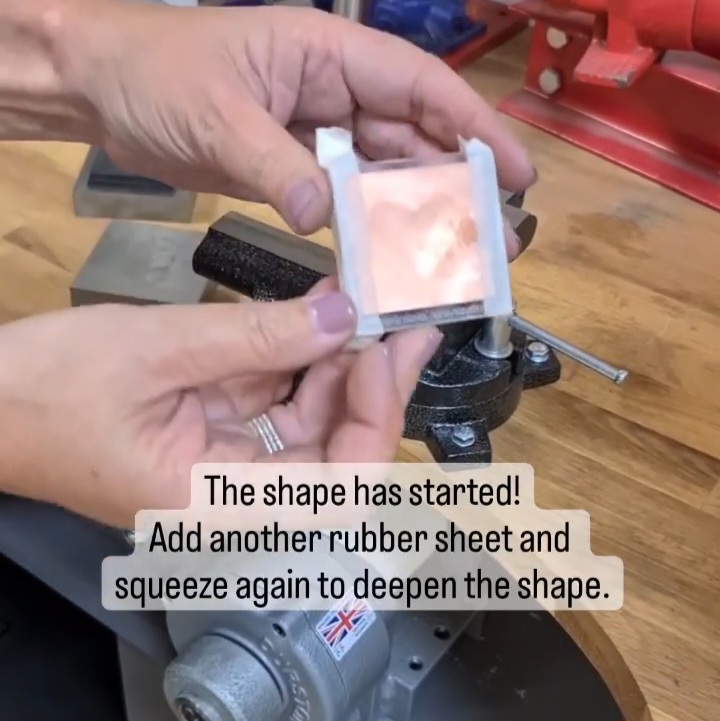 |  | 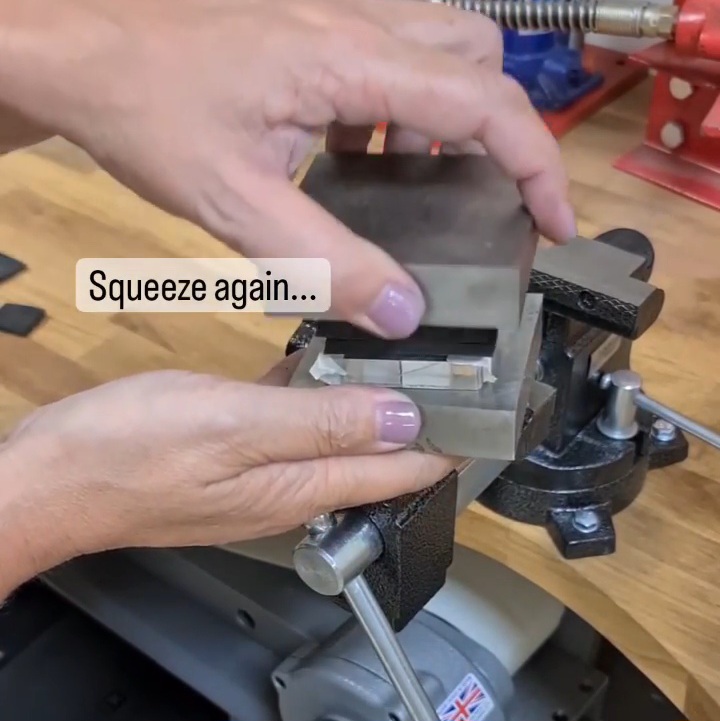 |
4. The shape has started! Add a second rubber sheet on top of the metal and squeeze in the bench vise again. | 5. If you'd like a deeper shape, add smaller pieces of rubber inside the shape... | 6. And then squeeze the stack of bench clock, sihouette die, metal and rubber once more. |
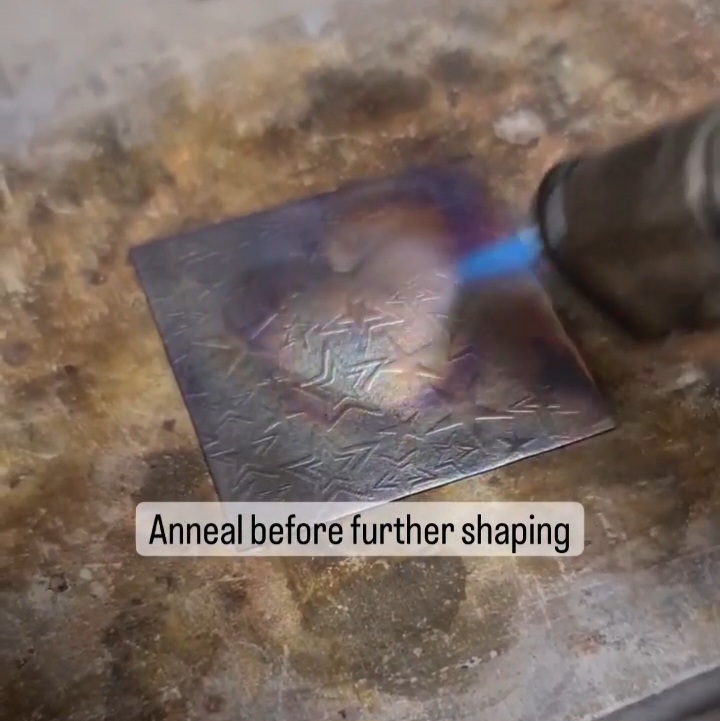 |  | 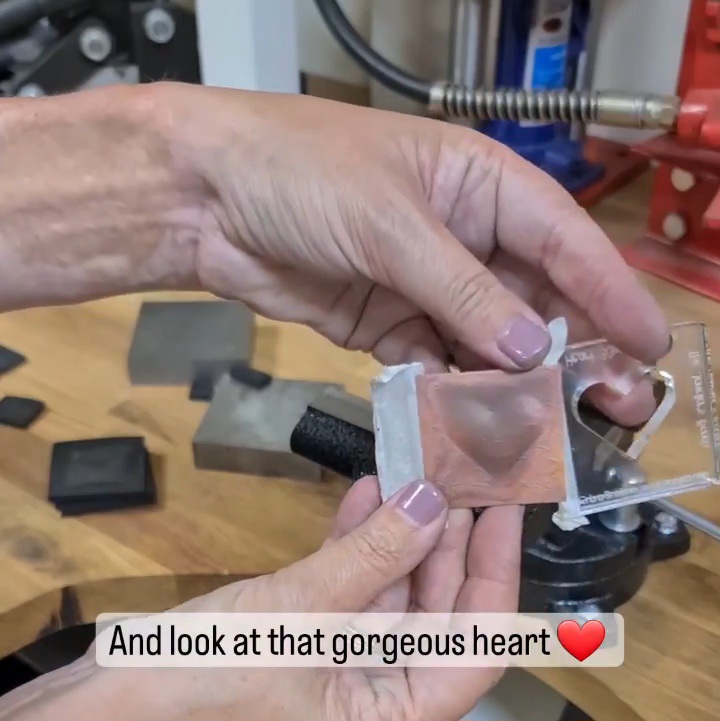 |
| 7. If you'd like to continue shaping the metal, take it off the die and anneal it as by this stage it will have become work harden. | 8. Carefully position the metal back on the die, add rubber and metal blocks and squeeze it in the vise again. | 9. And look at that gorgeous puffed heart! My favourite way of using these shapes is to make two, trim off the extra metal and solder them together, back to back, to make a hollow form. |
If you're looking for more hollow forms inspiration
have a look below
 |  | 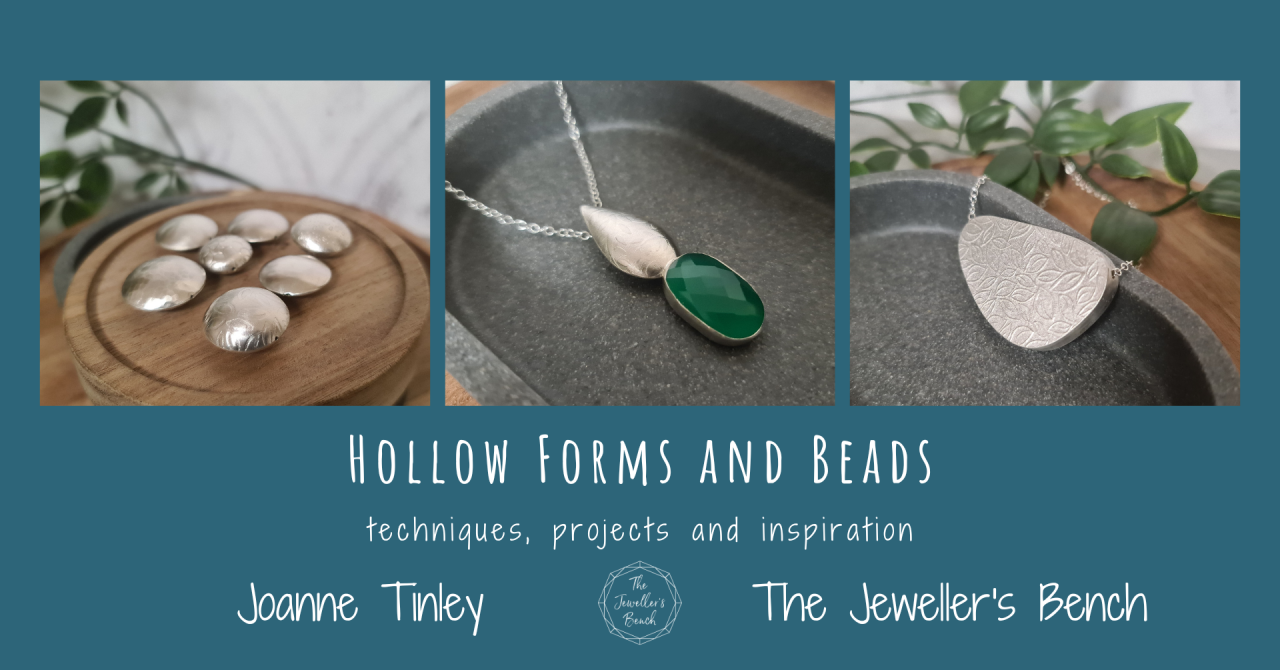 |
Dotty Box Earrings | Make a beautiful hollow Ginkgo pendant | Hollow Forms and Beads |
Learn how to make hollow boxes -
they're great for pendants too! | Learn how to make a beautiful and tactile Ginkgo-patterned hollow pendant | Learn four fantastic methods for making |
Categories: : hollow forms, jewellery tutorial, tool talk

Joanne Tinley
Tutor and Founder of The Jeweller's Bench
The Jeweller's Bench is run by Joanne Tinley. She has been making her own jewellery for as long as she can remember and left her first career as a school teacher to set up business as a jewellery designer and tutor nearly 20 years ago. She is
self-taught and like many people started with wire and beads. Learning how to solder, however, opened up a whole new world of jewellery making, one that she is keen to share!
