-
Flowered Hollow Form Pendant
17 Lessons-
StartFlowered Hollow Form Pendant introduction
-
StartFlowered Hollow Form Pendant equipment
-
StartFlowered Hollow Form Pendant soldering equipment
-
StartFlowered Hollow Form Pendant materials
-
StartFlowered Hollow Form Pendant annealling
-
StartFlowered Hollow Form Pendant texturing
-
StartFlowered Hollow Form Pendant pressing the shape
-
StartFlowered Hollow Form Pendant sawing
-
StartFlowered Hollow Form Pendant preparing for soldering
-
StartFlowered Hollow Form Pendant soldering safety
-
StartFlowered Hollow Form Pendant soldering
-
StartFlowered Hollow Form Pendant tidying the seam
-
StartFlowered Hollow Form Pendant preparing the bail
-
StartFlowered Hollow Form Pendant soldering the bail
-
StartFlowered Hollow Form Pendant polishing
-
StartFlowered Hollow Form Pendant final thoughts
-
StartSilhouette Die instruction sheet
-
Flowered Hollow Form Pendant
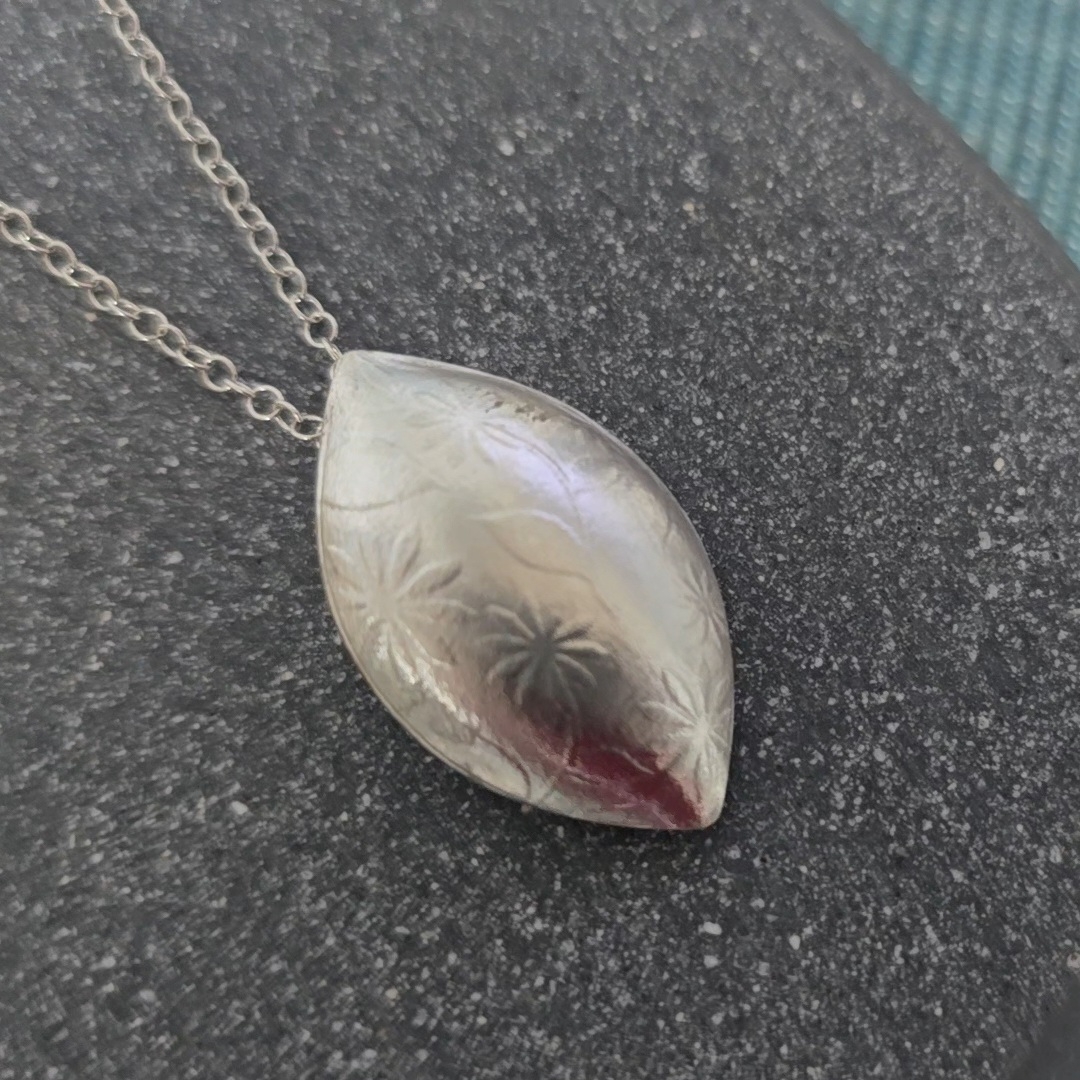
Make a beautifully tactile and light hollow pendant
About the Class
Hollow beads are a wonderful way to create larger statement pieces without the heavy weight of solid metal, helping to keep your silver costs lower too.
In this intermediate class, I’ll show you how to make a beautiful flowered textured and leaf shaped hollow pendant using silhouette dies and a hydraulic press. If you don't have access to a hydraulic press don't worry - there's a free tutorial showing you how to use the dies with a bench vise here!
During the class, you’ll learn how to solder a hollow form closed and how to add a bail safely. Please make sure that you watch the "soldering safety" section of the class to help you get the best results.
Although I've used a rolling mill texture you could adapt the design by using hammers, texture punches or even leave the metal silky smooth. Silhouette dies are available in many different shapes and sizes too, so don't feel you have to make a leaf shaped one!
The Flowered Hollow Form Pendant class is part of the Jeweller's Bench Membership - click here for more details. You may also find useful the silhouette die, hydraulic press and rolling mill tutorials available in the Free Tutorials and Downloads section.
If you’d like extra support while working through the class, you’re very welcome to join us in The Jeweller’s Bench Café Facebook group, where you can ask questions, share your progress, and see what other students are making along the way.
You will need:
Materials:
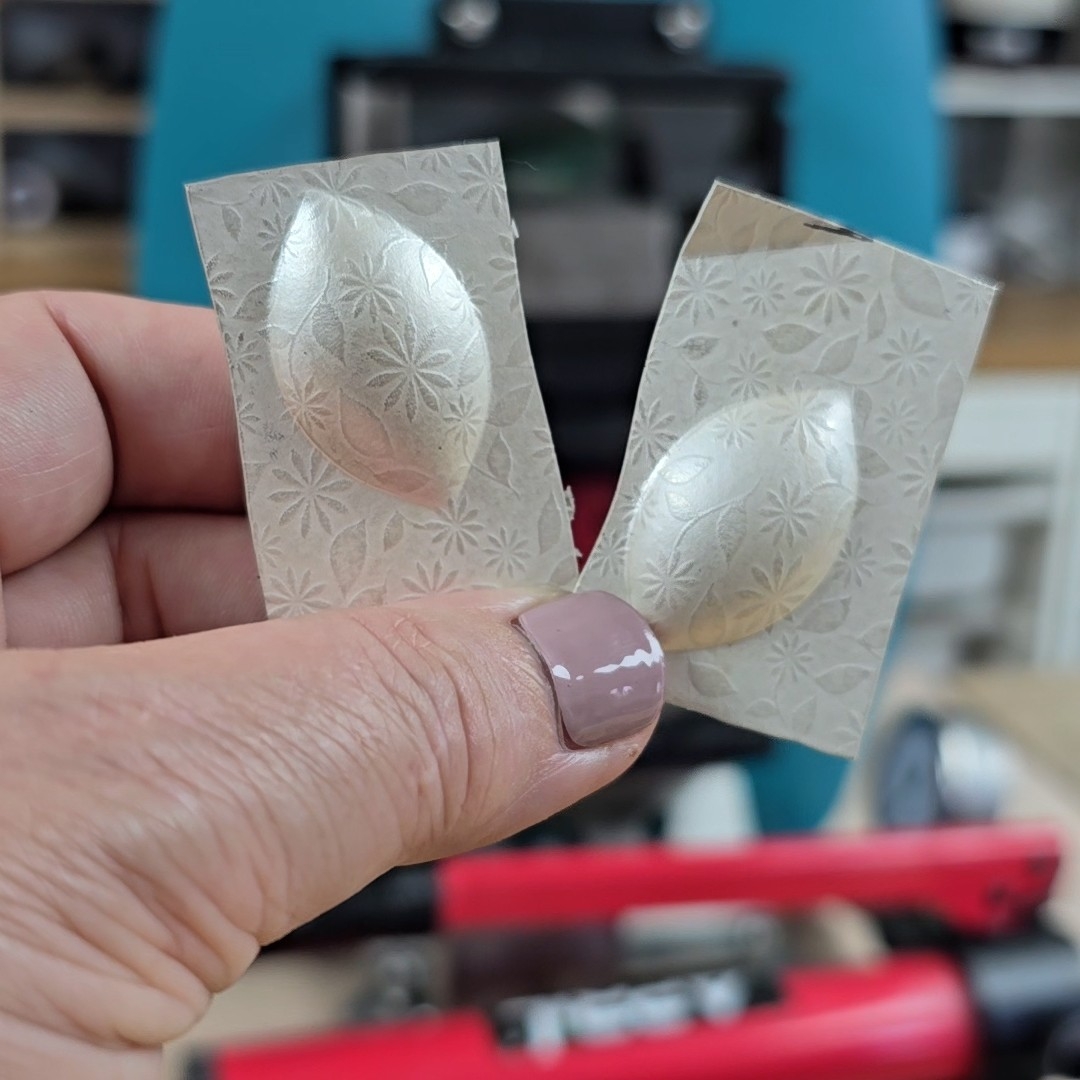
* 0.5mm thick sheet metal large to cover two of your chosen shape plus a little extra around the shape. The image shows how much extra I had around my leaf shapes.
* A short piece of 1mm wire for the bail
* A chain to finish the pendant
Equipment: (all the jewellery making kit listed here can be used for many different projects)
* Soldering kit - see here for more details
* texturing tool (optional) - a rolling mill and texturing sheet plus a piece of water colour paper were used in the class
* silhouette die and rubber sheet
* hydraulic press
* Jeweller's saw, beeswax (optional) and 4/0 saw blade
* Bench peg
* Sharpie
* 6" flat file and flat needle file
* Emery paper and (optional) sanding sticks
* Round nosed or bail forming pliers and wire cutters
* Bench drill or pendant drill with 0.9mm and 1.2mm drill bits
* For polishing - radial discs in a pendant drill or elbow grease and a silver polishing cloth.
An explanation of all the tools and materials that you need is included in the videos.
Texture sheets and silhouette dies available from The Jeweller's Bench on Etsy
1 hours 34 minutes long, 17 lessons
Course Curriculum

Joanne Tinley
Tutor and Founder of The Jeweller's Bench
The Jeweller's Bench is run by Joanne Tinley. She has been making her own jewellery for as long as she can remember and left her first career as a school teacher to set up business as a jewellery designer and tutor nearly 20 years ago. She is
self-taught and like many people started with wire and beads. Learning how to solder, however, opened up a whole new world of jewellery making, one that she is keen to share!
Legal Disclaimer: Every effort has been made to show safe working practices and to discuss health and safety aspects of jewellery making, but in the end I cannot take responsibility for how the tutorial information is used and how safely you work. Take the effort to set up your work area safely right from the start!
All Rights Reserved. No part of this course may be reproduced or shared without express, written consent from the author.

Reviews