Perfect earrings for gifting
 Joanne Tinley
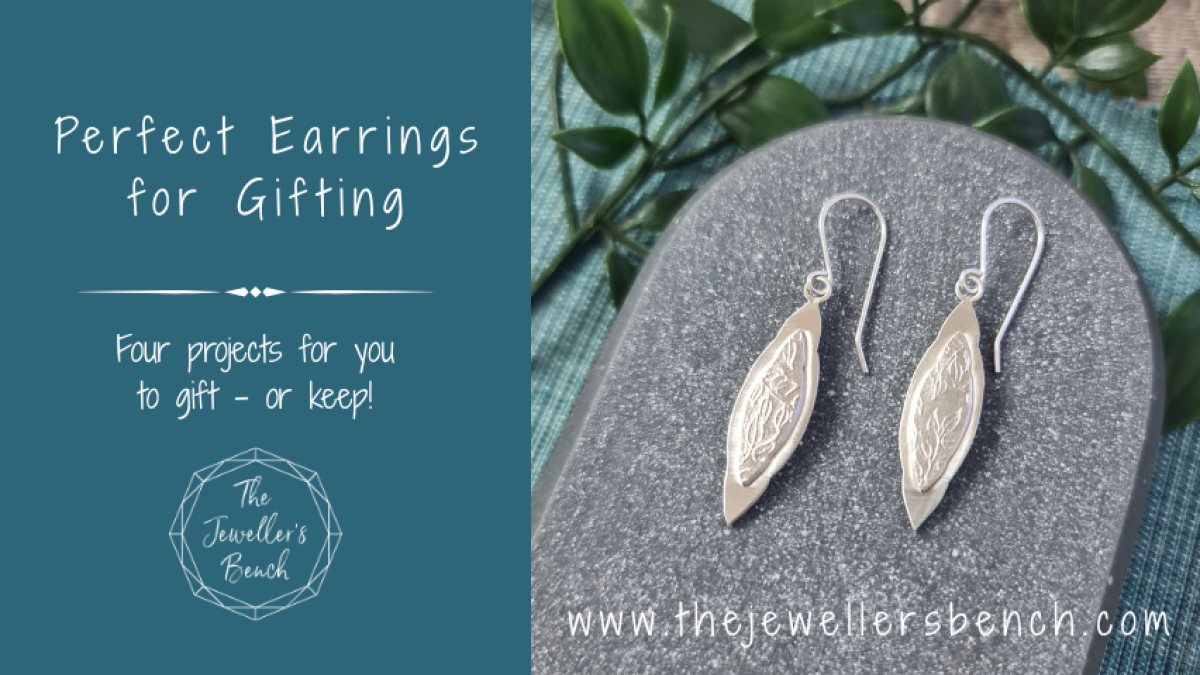
Use the Bails stencils to create four quick and easy pairs of earrings perfect for gifting (but we won't tell if you keep them for yourself!)
Looking for quick and easy jewellery gifts? You've come to the right place!
I've got four projects for you, each made using the Jeweller's Bench bail stencils and each perfect for gifting! Even better, each pair can be made using small pieces of silver sheet, so have a look through your leftovers from other larger projects.
For all of the projects you will need the following equipment:
- Soldering Kit
- Jeweller's saw and bench peg
- Files and emery paper
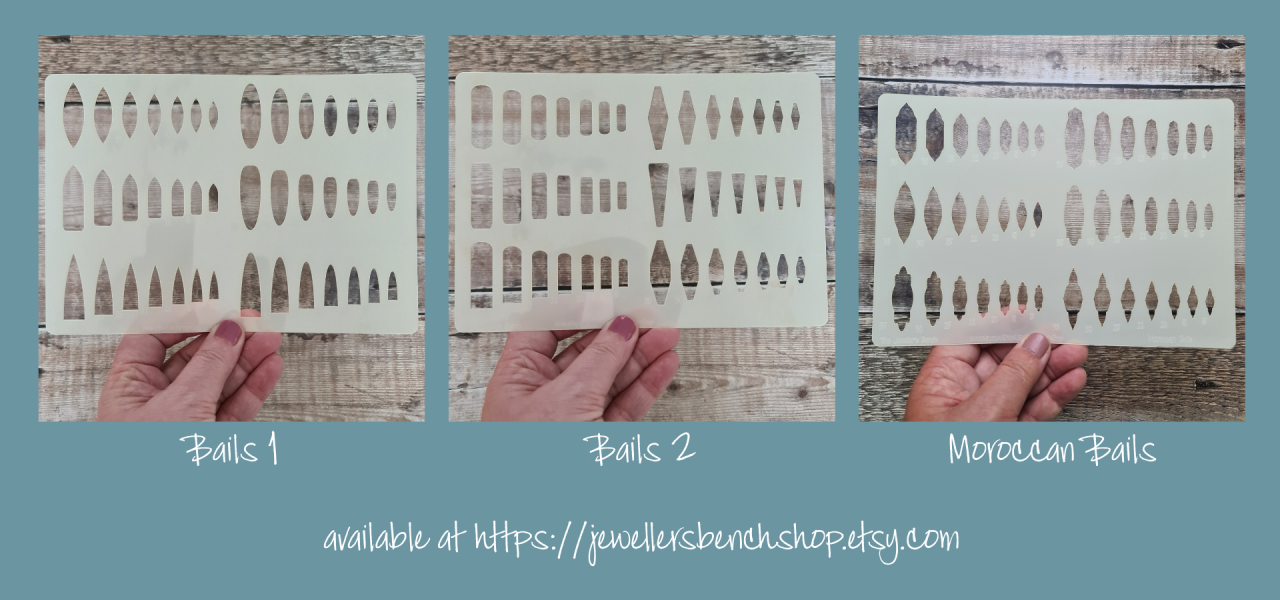
- Bails 1, Bails 2 or Moroccan Bails stencil (depending on the shape you want!) and sharpie
- Nylon jaw pliers, flat nosed pliers, wire cutters
- Planishing (rounded) hammer and bench block
- Small mandrels to bend sheet and earwires around
- Rolling Mill and texture sheets or texturing hammers
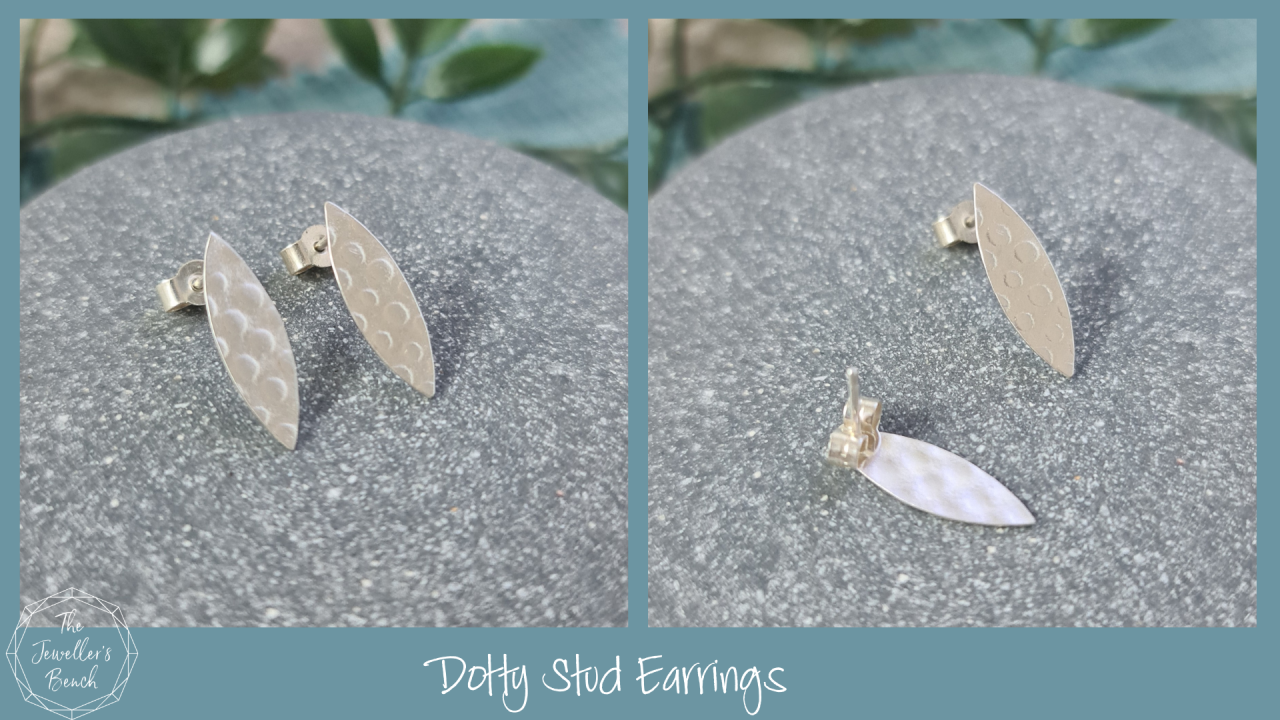
Dotty Stud Earrings - let's start with the simplest of the four projects!
1. Choose a 20mm shape from one of the Bails stencils and a piece of 0.7mm silver large enough for two of the shapes. I used the leaf shape from the Bails 1 stencil.
2. Anneal the silver and texture it with a texture sheet and rolling mill. Alternatively give the sheet a hammered texture.
3. Use the sharpie to mark the two shapes on the silver sheet. Saw each shape out. File and sand the edges to refine the shapes and make them lovely and smooth.
4. Solder stud posts to the back of each earring and clean them up in the pickle. Once clean, polish the earrings and add butterfly stoppers to the posts.
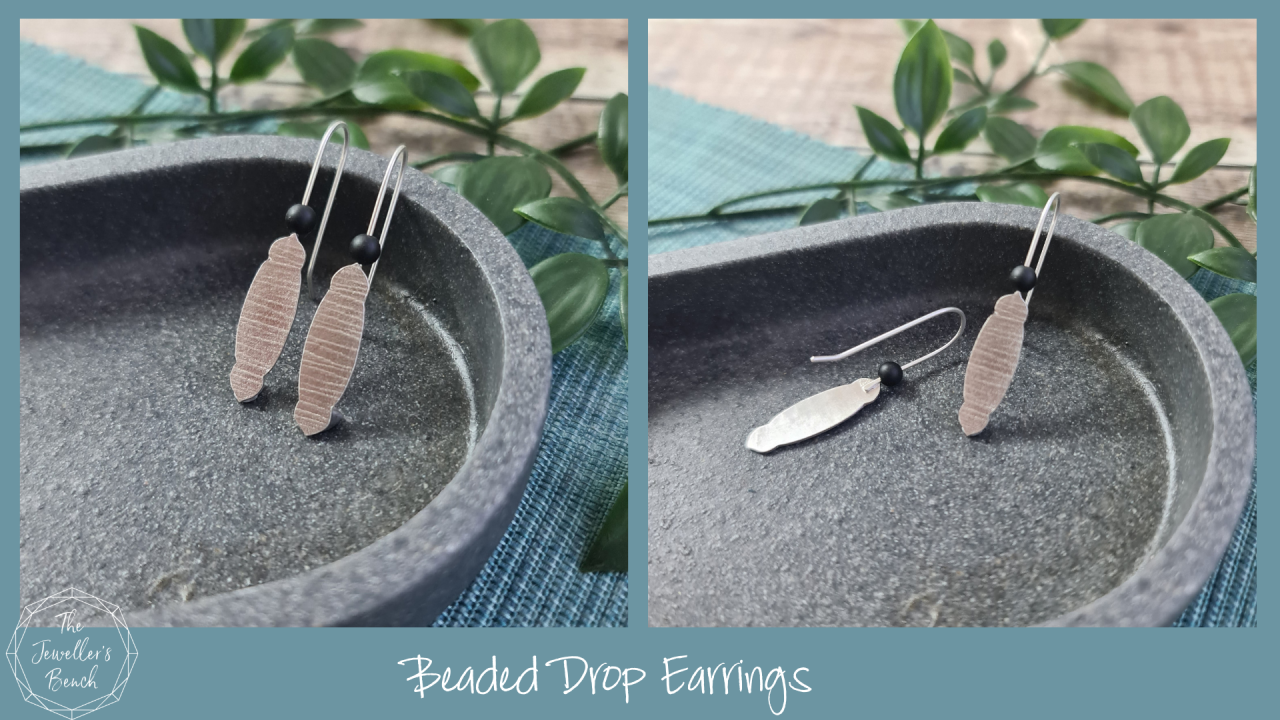
Beaded Drop Earrings - add a touch of colour
1. Choose a 25mm shape from one of the Bails stencils and a piece of 0.7mm silver large enough for two of the shapes. I wanted a more ornate look for these earrings and so chose a shape from the Moroccan Bails stencil.
2. Anneal the silver and texture it with a texture sheet and rolling mill. Alternatively give the sheet a hammered texture.
3. Use the sharpie to mark the two shapes on the silver sheet. Saw each shape out. File and sand the edges to refine the shapes and make them lovely and smooth.
4. Cut two 55mm lengths of 0.8mm round wire for the earwires. Hammer one end of each into a paddle shape. This will create a neater and stronger solder join.
5. Solder the paddle ends of the wires onto the back of the earrings and clean them up in the pickle. Once clean, polish the earrings.
6. Thread a small bead onto each wire before shaping and finishing the earwires. This quick video will help you finish the earwires.
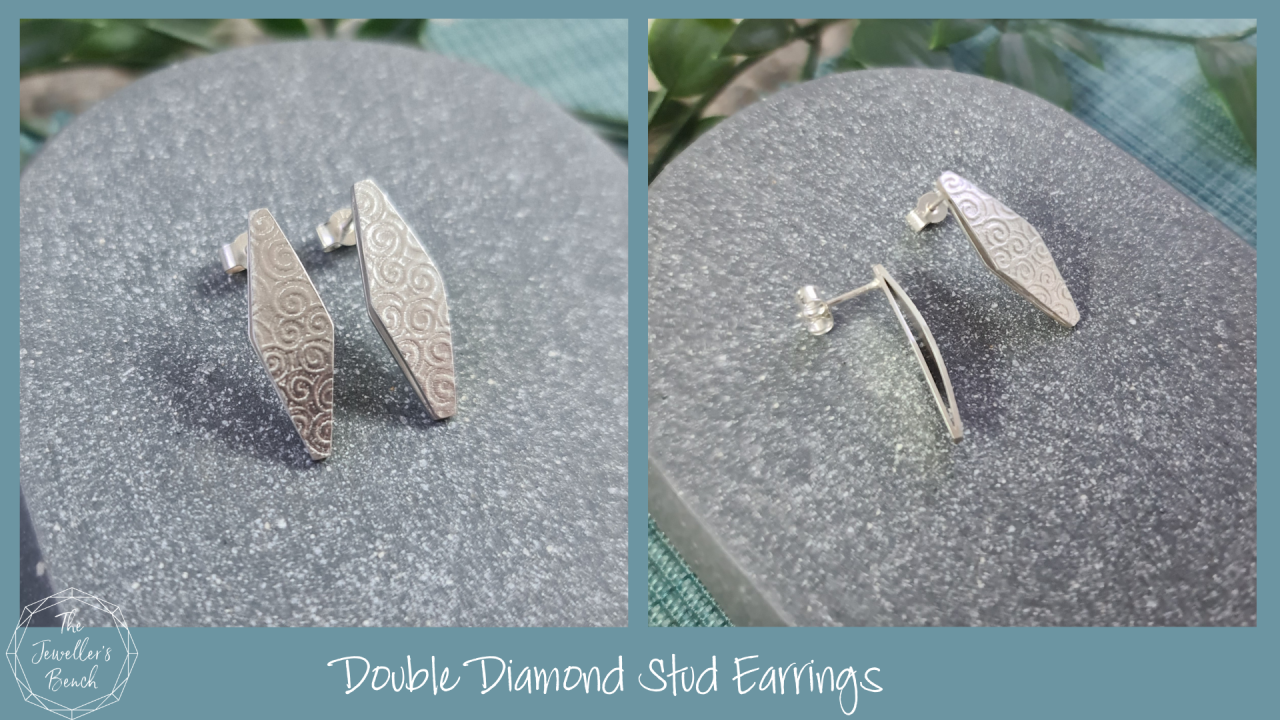
Double Diamond Stud Earrings - add extra interest to your stud earrings with shaping and layering
1. Choose a 25mm shape from one of the Bails stencils and a piece of 0.7mm silver large enough for four of the shapes. I used the long diamond shape from the Bails 2 stencil.
2. Anneal enough silver for two of the shapes and texture it with a texture sheet and rolling mill. Alternatively give this piece of sheet a hammered texture. Leave the other half of the silver untextured.
3. Use the sharpie to mark the two shapes on each piece of silver sheet. Saw each shape out. File and sand the edges to refine the shapes and make them lovely and smooth.
4. Gently bend both of the textured shapes to give them a nice curve,with the texture on the outside of the curve. Leave the untextured shapes flat.
5. Hold a textured piece of silver against a flat file, textured side up, and file to create flat areas at the inside ends of the curve. This will create neater and stronger solder joins.
6. Apply a little solder inside each tip of both curved pieces of silver and place each of them on a flat shape. I prefer solder paste for this as it's tackiness helps keep it in place. Solder the two pairs of silver shapes together and clean them up in the pickle.
7. Solder stud posts to the back of each earring and clean them up in the pickle. Once clean, polish the earrings and add butterfly stoppers to the posts.

Layered Drop Earrings - getting a little fancier now!
1. Choose 35mm and 25mm matching shapes from one of the stencils. Again, I wanted a more ornate look for these earrings and so chose a shape from the Moroccan Bails stencil.
2. You will need a piece of 0.7mm sheet large enough for two of the 35mm shape and another smaller piece large enough for two of the 25mm shape. Anneal the smaller piece of silver and texture it with a texture sheet and rolling mill. Alternatively give the sheet a hammered texture. Leave the larger piece untextured as a contrast.
3. Use the sharpie to mark the shapes on the pieces of silver sheet - two 25mm shapes on the textured silver and two 35mm on the untextured silver. Saw each shape out. File and sand the edges to refine the shapes and make them lovely and smooth.
4. Place the two textured pieces upside down on a soldering block and add flux and small pieces of medium solder. Melt the solder into small puddles. Do not quench the silver, but place each piece, textured side up, on an untextured shape. Make sure the shapes are centred and reheat to remelt the solder and join the pairs of shapes together. Clean the silver up in the pickle.
5. Use easy solder to solder a small jump ring at one tip of each earring. Again, clean the silver in the pickle. Once clean, polish the earrings.
6. Make a pair of earwires using this quick video to help you. Thread the earwires through the jump rings at the top of the earrings.
If you're looking for more earrings inspiration
have a look at these classes...
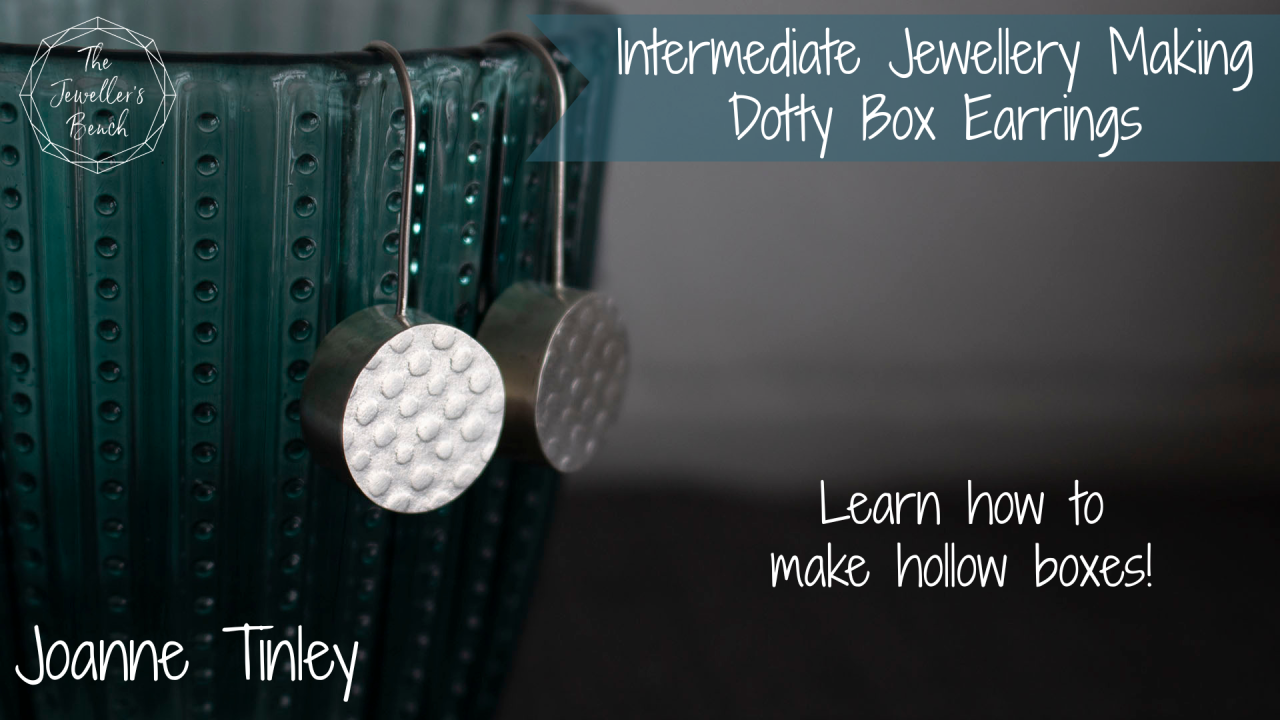 | 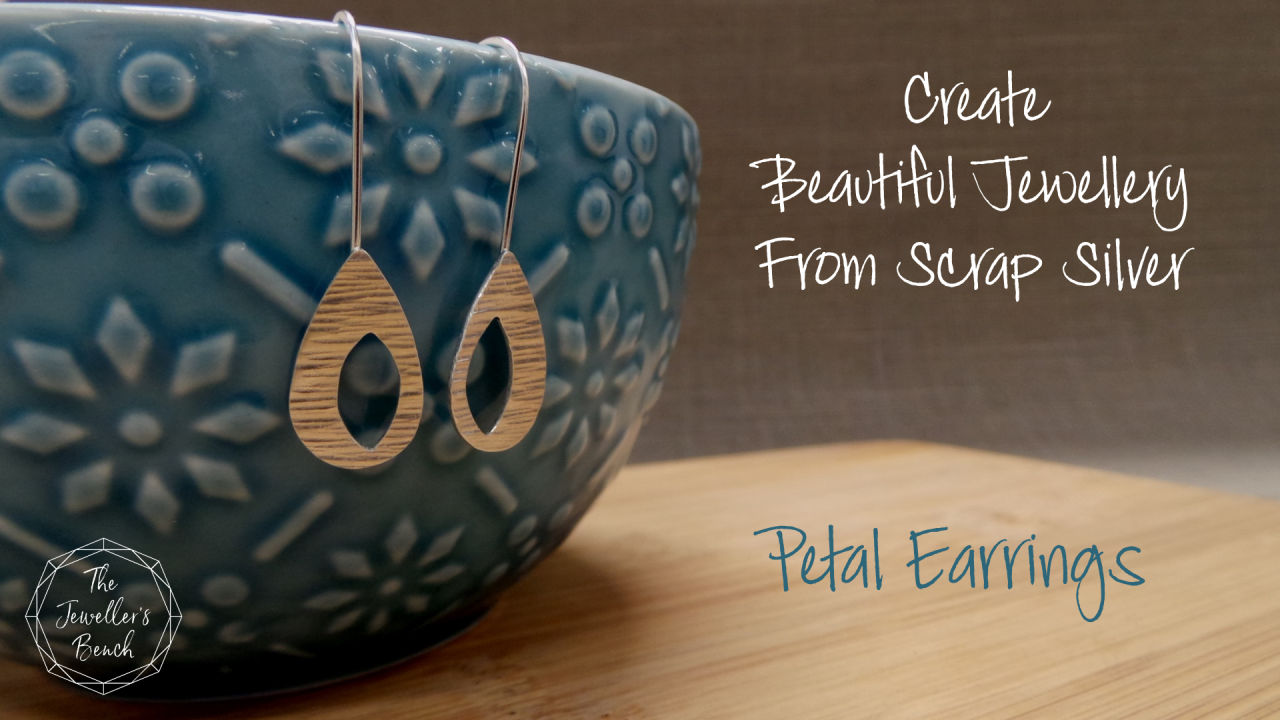 | 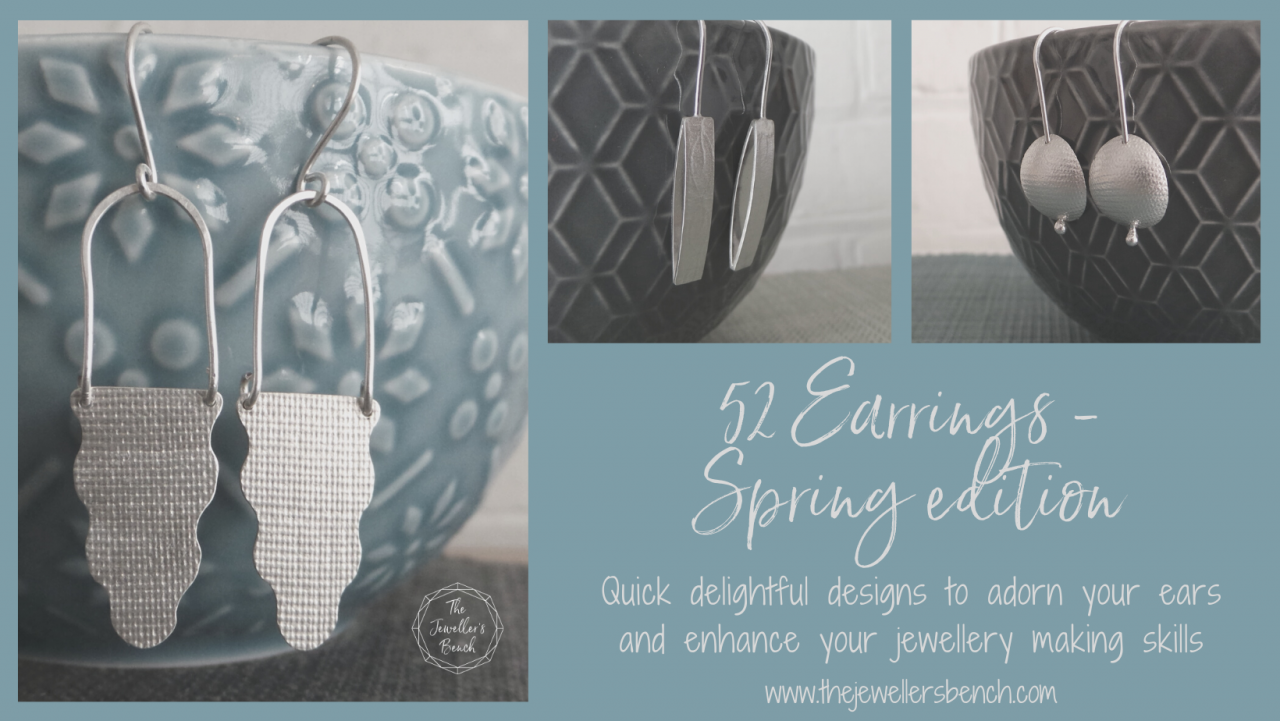 |
Dotty Box Earrings | Petal Earrings | Spring Edition of the 52 earrings project |
Learn how to make hollow boxes -
they're great for pendants too! | A quick project that uses silver left over from other projects. | The 52 earrings project resulted in 52 earring designs in one year. Enrol in just the Spring Edition, or go for the full year here. |
Categories: : earrings tutorial, jewellery tutorial, tool talk

Joanne Tinley
Tutor and Founder of The Jeweller's Bench
The Jeweller's Bench is run by Joanne Tinley. She has been making her own jewellery for as long as she can remember and left her first career as a school teacher to set up business as a jewellery designer and tutor nearly 20 years ago. She is
self-taught and like many people started with wire and beads. Learning how to solder, however, opened up a whole new world of jewellery making, one that she is keen to share!
