-
Reticulated Star Pendant - learn how to texture silver with your blowtorch
13 Lessons-
Startintroduction
-
Startmaterials
-
Startequipment
-
Startsoldering equipment
-
Startdepleting the silver
-
Startreticulating the silver
-
Startsawing the star
-
Startfiling
-
Startsoldering the bail
-
Startburnishing
-
Startfinal thoughts
-
StartIntermediate Silversmithing Equipment List
-
StartSawing hints and tips booklet
-
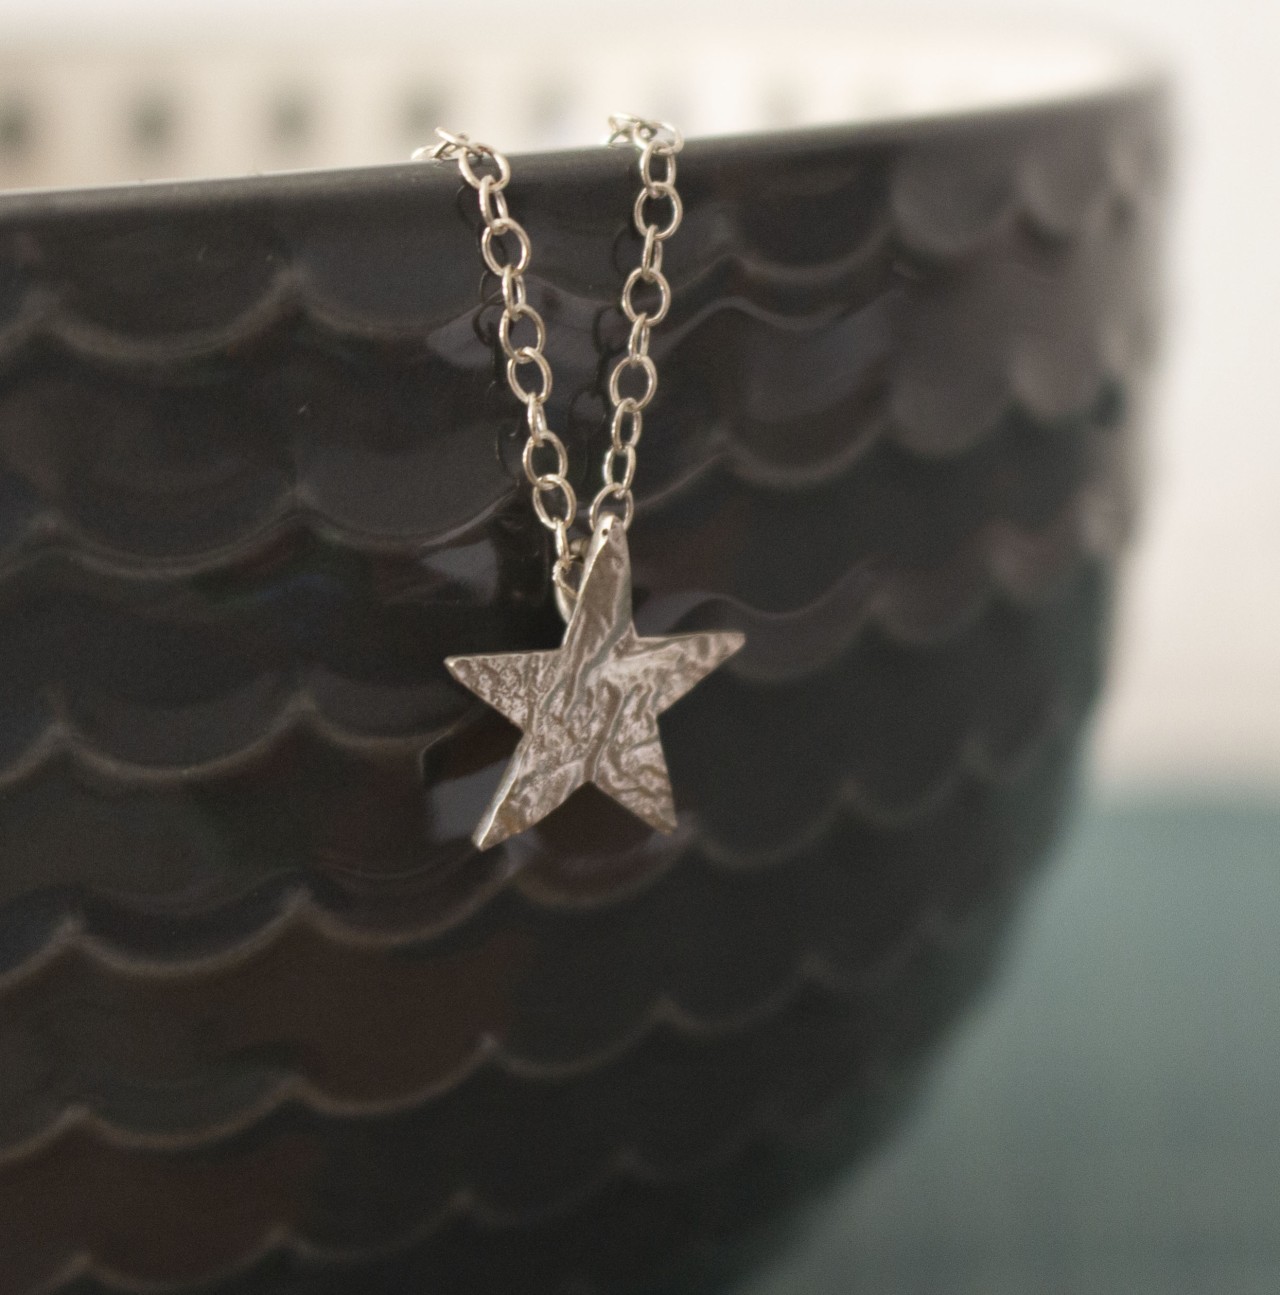
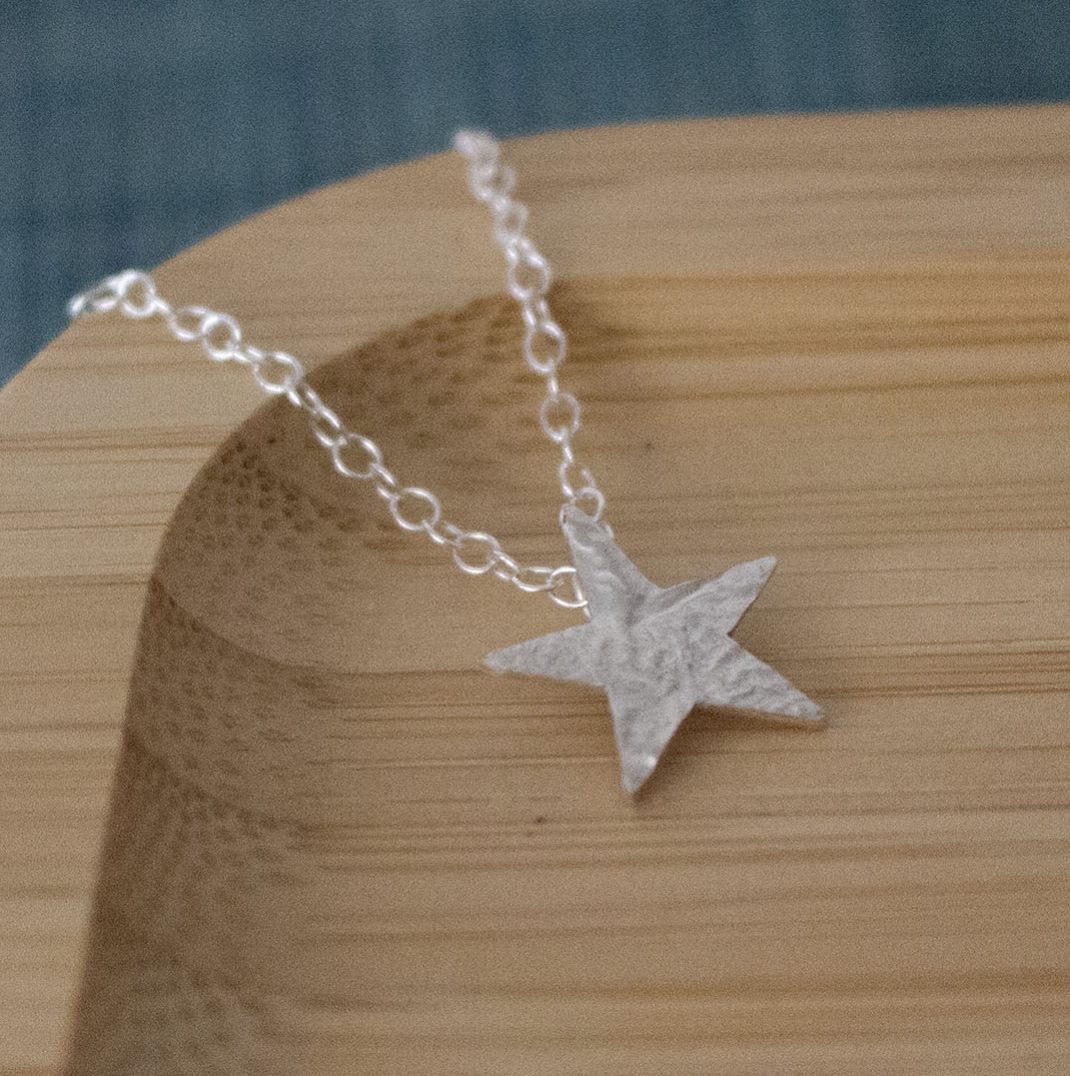
Reticulated Star Pendant
Learn how to texture silver with your blowtorch
About the Tutorial
Learn how to create beautifully textured silver using your blowtorch.
While smooth polished silver and rolled or hammered textures are always popular, reticulation creates something completely different — an organic, rippled surface that is unique every time you make it. Reticulated silver is great fun to work with because the patterns are never completely predictable, giving each piece its own character.
In this class, I’ll guide you step by step through the process of preparing your silver correctly, heating it safely, and creating texture by carefully melting the surface of the metal. Using your finished reticulated silver, we’ll then make a simple and elegant star pendant, and along the way I’ll also give you a refresher on sawing techniques and tips for achieving a neat finish.
This class is a lovely way to build confidence with your torch while experimenting with texture and creating a piece that feels truly one of a kind!
The Reticulated Star Pendant class is part of the Jeweller's Bench Membership - click here for more details.
If you’d like extra support while working through the class, you’re very welcome to join us in The Jeweller’s Bench Café Facebook group, where you can ask questions, share your progress, and see what other students are making along the way.
You will need:
Materials:
A piece of sterling silver sheet at least 0.8mm (20 gauge) thick and larger than your finished design so that you can choose the best part of the texture, a small amount of 0.8mm round wire for the bail, and chain to finish pendant.
Equipment:
* Soldering kit - see here for more details
* Sticker maker or stencil to create the star shape, plus sharpie if using a stencil
* Jeweller’s saw and saw blade
* Bench peg
* Needle files and emery paper
* Steel or agate burnisher
* Wire cutters and round nose pliers
An explanation of all the tools and materials that you need is included in the videos, and a downloadable equipment and materials list is available with the class.
1 hr 16 mins long, 11 lessons
Course Curriculum
"Wonderful. Clear explanation of the reticulation process. Thank you."
Ada G.
"Fun to do. Reticulation at home using a small torch gives great results. As always Joanne gives clear instructions and I always learn from watching how she does things."
Diana H.
"Really excellent class that covered depletion of sterling (I'll be using this for my keum-boo) as well as reticulation. A two-fer."
Dawn G.
Legal Disclaimer: Every effort has been made to show safe working practices and to discuss health and safety aspects of jewellery making, but in the end I cannot take responsibility for how the tutorial information is used and how safely you work. Take the effort to set up your work area safely right from the start!
All Rights Reserved. No part of this course may be reproduced or shared without express, written consent from the author.

Joanne Tinley
Tutor and Founder of The Jeweller's Bench
The Jeweller's Bench is run by Joanne Tinley. She has been making her own jewellery for as long as she can remember and left her first career as a school teacher to set up business as a jewellery designer and tutor nearly 20 years ago. She is
self-taught and like many people started with wire and beads. Learning how to solder, however, opened up a whole new world of jewellery making, one that she is keen to share!

Reviews