Leaf Motif Earrings Tutorial
 Joanne Tinley
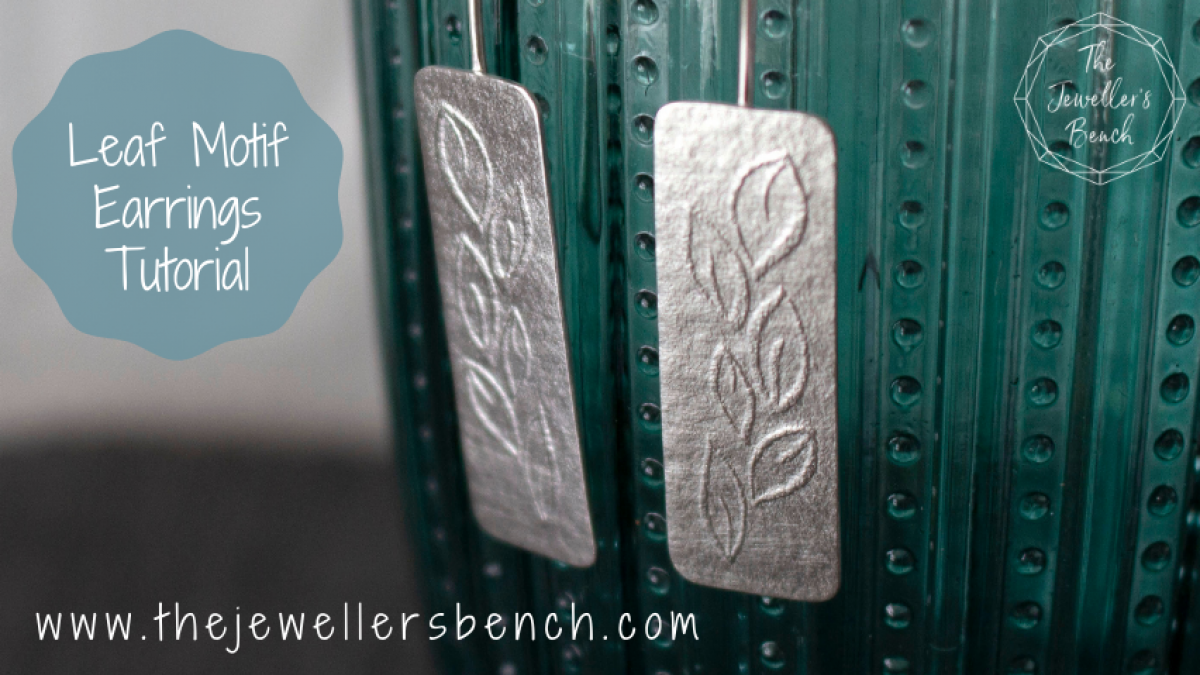
A quick (and free!) tutorial teaching you how to make these beautiful earrings with a rolling mill embossed texture.
Here's a quick tutorial for you, showing you how to make a simple pair of earrings with a lovely leaf motif design.
This project uses one of my rolling mill texture sheet, one full of different sized motifs and mirror images of them too - ideal for making beautiful earrings!
It will teach you how to accurately line up rolling mill textures on your metal sheet, and will also help you improve your soldering skills!
You will need:
Materials:
1. Two small pieces of sterling silver or copper sheet, depending on your preference. I used two pieces of 0.7mm thick sterling silver sheet (just under 20 gauge), measuring 12mm wide and approximately 15mm long. Each piece was a little bigger than the motif I'd chosen
2. 0.8mm (20 gauge) wire for the earwires. I used two 5.5cm lengths
3. A pair of motifs from the Jewellers Bench Shop or a pattern you have cut from card yourself. I used the smallest motif in the Watercolour Leaves set found here.
Equipment:
Soldering Kit
Jeweller's saw and bench peg
Flat file and emery paper
Nylon jaw pliers, flat nosed pliers, wire cutters
Planishing (rounded) hammer and benchblock
Scissors, pencil and sharpie
Rolling Mill
 |  |
1. Use sharp scissors to neatly cut a pair of motifs from the larger sheet, leaving some extra card around the motif itself. | 2. Prepare two rectangles of silver that are big enough to cover the motifs. If the silver is not already annealed do that now - watch this video to learn how to anneal!
3. Use pencil on the card and a sharpie on the silver to mark the midpoint down the motif and the midpoint down the silver. Transfer the marks a little way over the back of each piece of material too. |
 |  |
4. Taking one motif and one piece of silver at a time, use the lines you have just marked to help you line up the motif on the silver as centrally as possible and hold them firmly together. If you need help setting up your rolling mill to get the best results have a look at this free video tutorial! 5. Send the first pair of materials through the rolling mill, making sure that you send it through square and not at an angle so that you keep the rectangular shape. Repeat with the second pair. | 6. Use nylon jaw pliers to flatten the silver if necessary, although the rolling mill can create an attractive curve. |
 |  |
7.
Line up the two embossed motifs next to each other and mark the silver
with lines above and below to help you trim off the excess silver to
make the embossings match up as perfectly as possible.
| 8. Saw off the excess silver. |
 |  |
9. File the tops and bottom of each earring square and smooth. Now is also a good time to check that the motifs are perfectly in the centre of each earrings, removing silver from the long sides if necessary. | 10. File the corners rounded and sand the edges to make everything smooth and comfortable. |
 |  |
11. Cut two lengths of 0.8mm (20 gauge) wire - mine are 5.5cm long, but if you'd like longer earrings cut longer pieces of wire! Lightly hammer one end of each piece to create a flatter "paddle". This will help form a stronger solder join. 12. Solder an earwire onto the back of each rectangle. | 13. Shape each earwire around a sharpie or small mandrel. File the ends of the wires to make sure that they are smooth, and use flat nosed pliers to "flick" the ends out for that classic earwires look. Hammer the front of the U shape a little as this adds strength to the earwires. 14. Polish your earrings, and enjoy wearing them! |
If you're looking for more earrings inspiration
have a look at these classes...
 | 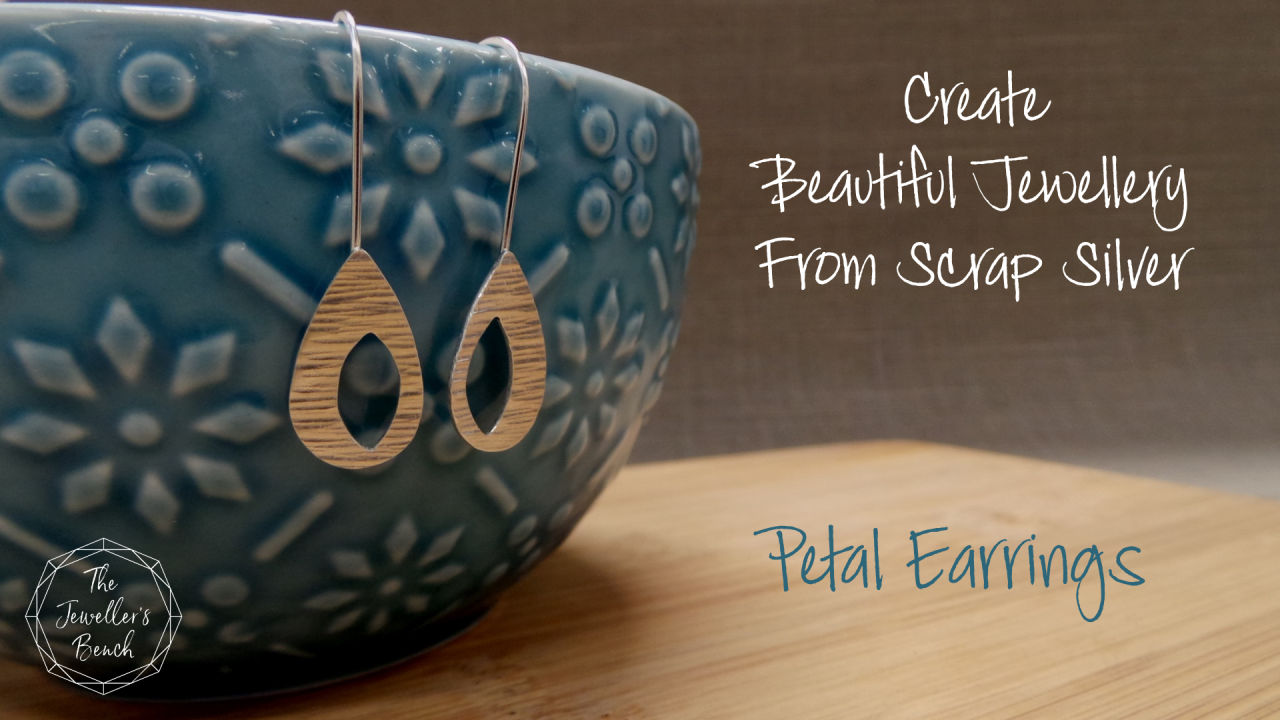 | 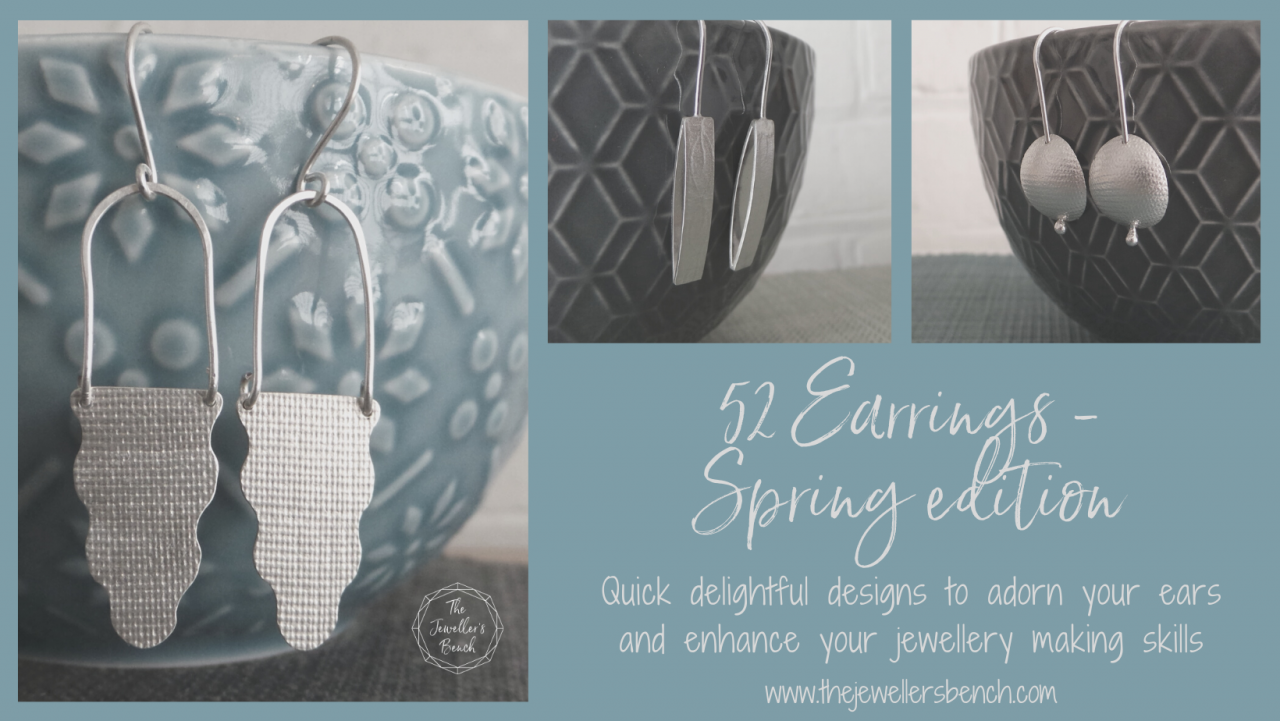 |
Dotty Box Earrings | Petal Earrings | Spring Edition of the 52 earrings project |
Learn how to make hollow boxes -
they're great for pendants too! | A quick project that uses silver left over from other projects. | The 52 earrings project resulted in 52 earring designs in one year. Enrol in just the Spring Edition, or go for the full year here. |
Categories: : earrings tutorial, jewellery tutorial, rolling mill project

Joanne Tinley
Tutor and Founder of The Jeweller's Bench
The Jeweller's Bench is run by Joanne Tinley. She has been making her own jewellery for as long as she can remember and left her first career as a school teacher to set up business as a jewellery designer and tutor nearly 20 years ago. She is
self-taught and like many people started with wire and beads. Learning how to solder, however, opened up a whole new world of jewellery making, one that she is keen to share!
